Are there any restrictions for making photos?


There are no any restrictions for making photos in the theme parks during the Harbin International Ice and Snow Festival.
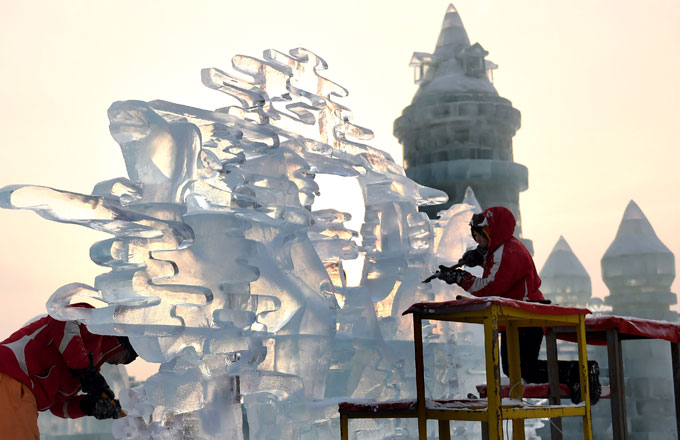
The below are some tips for photographing in day and night during the ice festival. The day photography tips are useful when traveling the day spots such as the Siberian Tiger Park, Stalin Park, Sun Island International Snow Sculpture Art Expo, Yabuli Ski Resort, Jihua Ski Resort, Erlongshan Ski Resort, China's Snow Town, Central Street, Songhua Rive Ice and Snow Happy Valley, etc. The night photography tips are workable for photographing in the Ice & Snow World and the Ice Lantern Fair.
For detailed information, visitors can contact with Ice Festival Harbin:
Phone: +86 773-2675596
Email: info@icefestivalharbin.com
DAY PHOTOGRAPHY TIPS
Gear
Carrying the right gear is the most important thing. If you are carrying a DSLR or a Micro 4/3 camera with interchangeable lenses, you really don’t want to change lenses outdoors. We recommend a zoom lens with a hood. If you are carrying a DSLR, try getting an 18 -200 lens. A Micro 4/3 you may want to think about an 18-180 or equivalent. In the cold weather, you run the risk of condensation inside the camera body. Photography in the cold requires you to carry fully charged batteries, you really don’t want to change batteries in the cold for sake of snow or other debris getting in. A strong camera strap Like the Black Rapid RS-7 that will fit around you coat is suggested.
Accessories
Cold weather photography can be fun if you prepare correctly. Dressing warm is the first thing. However, bring gloves. Some people hate the feel of regular gloves. There are gloves like the Aquatech Sensory Gloves, which allow fingertip control for your camera while keeping your hands warm. Having a one gallon zip lock bag is recommended, so you can seal up you camera before you go indoors. This will help camera slowly warm up in a dry manner. Use a rain cover in the snow to prevent the camera from getting wet. In addition, do not forget lens cleaner cloths; moisture can form on the front of your lens very quickly. A memory card wallet is nice to have to keep your SD or CF cards in control. In the winter, try to keep on a decent UV or clear filter to protect from debris from moving card or the occasional snowball.
White Balance
Setting the white balance for snow can be tricky at times. You can find yourself with blue snow in your shots or strand shadows. First thing to do, if you can, is shoot raw. Auto white balance can make the snow look a little blue. Shooting in raw will enable you to make changes to the color that you could not do in Jpeg. You will be able to make your snow white. Play with your white balance settings until you find what you like or manually set it using a grey card or white balance cap.
Exposure
In the snow, you want to maximize the detail. This can be difficult because there so much white to deal with. Over expose, you will wash out details. Under expose, the image will be too dark. Make use of your histogram also. This graphic representation of the tonal range of your photography will allow you to get your exposure just right. The histogram will tell you the level of adjustment you need to make to your photo if you take a quick look at it after your shots.
A Little Flash
When it is snowing, you can use your flash to light up the snowflakes a bit. All you need is a little extra light. A pop up flash with the Gary Fong puffer or an off camera flash like Nikon SB600 and a diffuser like the Gary Fong lightsphere, can go a long way. Lowered by a few stops the flash adds a little pop if caught just right.
Stay warm
Not all winter photography has to be in the cold in Harbin. You can choose to capture your images from a warm spot. Inside a car, you can get a window mount. If you can find a nice high window with a good view, you can capture a vista or just people walking by.
Color
Try to look for color in the snow. Color can pop when everything else is grey cold and a little ugly. Color, diminished in the winter, is special. Do not be afraid to use it. Find points of color and focus on it, it will add contrast to your image.
NIGHT PHOTOGRAPHY TIPS
Capturing Night Signs
When photographing signs in the Ice and Snow World or the Ice Lantern Fair at night, one of the most important factors is light metering. The combination of a bright sign and a dark background can confuse the camera, leaving you with an under or over exposed image. You need an accurate metering mode that you can control, so choose spot metering and choose a mid toned area for a balanced shot (in this case the red lettering). Place your camera on a sturdy tripod to avoid camera shake and turn off the flash if you are too close to the sign.
Get high quality night shots
If you want the best night shots you need to shoot in the best image quality, and that means RAW. By shooting in RAW your images will retain the most ‘information’, which gives you greater scope for enhancing your shots in Adobe Camera Raw and other raw-processing software. RAW is especially beneficial when taking night shots as it gives more flexibility when you want to change things such as color temperature (or White Balance) or accurately increase (brighten) or decrease (darken) your exposures.
Use a tripod for sharp pictures
Shooting at night obviously means there will be less light and therefore slow shutter speeds, anywhere from 1-30 seconds – that’s way too slow to shoot hand-held. So you’ll need to attach your digital camera securely to a tripod if you want sharp results. Make sure your tripod is set up correctly and rock solid – it’s easy to end up with soft images because you haven’t double-checked. Hang your camera bag off the hook on the bottom of the centre column if you can. And don’t hold onto your tripod as you’re shooting with slow shutter speeds because any slight movement can mean blurred photos.
Use the lens sweet spot
Use the ‘sweet spot’ range of apertures for your lenses – this is usually between f/8 and f/16, but take test shots to find out. Even pro-level lenses don’t produce the best results when used at their maximum and minimum apertures. By using apertures in the middle of the available range you’ll increase your chances of capturing the sharpest shots with your lens.
Night photography settings
To take control of your exposures it’s best to shoot in Manual mode so you can choose the best narrow aperture and slow shutter speed for night photography. Begin by composing and focusing your shot, set a narrow aperture around f/16, then dial in the right shutter speed until the Exposure Level Mark is in the middle of the Exposure Level Indicator. Take some shots and review them on your LCD. Remember this is what your camera thinks is the best exposure, but if your shots are looking too bright, underexpose by 1-2 stops so that they actually look dark!
How to get a ‘starburst’ effect on street lights
Using a narrow aperture (around f/16) will not only ensure a deeper depth of field, so your shots are sharp from foreground to background, but will also make street lights ‘sparkle’ in your scenes to give your pictures an added magical effect.
Composition at night
Carefully study the scene before you start taking photos. Are parts of the scene in darkness? Do areas of the shot become more interesting, brightly lit or colorful as it gets darker? If so, don’t be afraid to zoom in on the most photogenic areas. Zoom in with your wide-angle zoom lens or ‘zoom with your feet’ – just move closer to your subject…
Use Mirror Lock-up
The slightest movement can create unwanted camera shake, and this even includes the mirror moving up and down inside your digital SLR. You can quickly enable Mirror Lock-up (look for it in your camera menu’s Custom Functions menu) to get around this potential pitfall.
Don’t touch your camera!
When taking long exposures at night, even touching your camera to press the shutter button can create enough movement to leave you with blurred results. Use your digital camera’s built-in self-timer to trigger the shutter after you’ve pressed the button to avoid any problems. For shots that rely on accurate timing, use a remote release instead.
Recommended Settings
Night photography is a challenge, and quite often experimentation is the key to success. It is possible to handhold a camera and still shoot at night but this may require a wider aperture, a higher ISO rating and some flash so that the images don’t become blurry. You are usually working with shutter speeds of 1/15th of a second or slower. If you use a tripod then you can afford to use AV (aperture priority) mode and let the camera choose the shutter speed.
Recommended Equipment
Because the night scene of the Harbin Ice and Snow World is fantastic and spectacular, a wide-angle lens is very useful. It gives a panoramic effect and requires less light than a telephoto lens. A tripod is required when shooting in low-light in order to avoid camera shake. Tripods allow you to have longer shutter times and therefore avoid using flash, which can look unnatural and harsh in night photographs. Flash is useful however, in night time portrait photography. Cable release and shutter remotes are useful to avoid touching the camera during a long exposure. You can also use special filters at night, such as a star filter that makes lights look like they are small stars.